Showing posts with label Crafts. Show all posts

Tuesday, January 17, 2012

Glue paint

Lately I've felt like Pinterest is holding me back.
I used to come up with creative things on my own but now I just go look at what I've got pinned.
I kinda wonder why should I try and come up with my own ideas because people seriously think of everything.
But I miss the satisfaction of knowing that my brain does work and I can do awesome things by myself.
So I'm trying to spend less time on there and use my mind some more and I'm proud to say this I came up with on my own.
I'm sure someone has already thought of it but I haven't seen it.

So today was rainy and kinda dreary.
On days like this my kids really like to paint
but we were out of paint and I wasn't going to the store.
One thing that I do have a lot of is glue.
When it's back to school time I have a little issue with buying a ridiculous amount of school supplies.
It comes in handy sometimes though.
So instead of painting with paint we used glue.
We poured the glue into cupcake liners.
I have some that are made out of aluminum foil so they are a little more sturdy but I was thinking the Styrofoam egg cartons would work really well for this.
Then you just add some food coloring to the glue and paint like normal.


We also tried making some flowers pieces of cardboard.

Take your nice little piece of cardboard and roll it up like this.
Put a rubber band around it to help hold it in place and then you can use it like a stamp.
And then you have a cute little flower.
I think this would probably work better with actual paint but the kids still thought it was super cool.
Braeden kept saying it makes a perfect flower every time!
You could try it with different thicknesses of cardboard for different looks too.
Painting with glue is pretty awesome.
Besides it saving my butt when I didn't have paint
it drys glossy which Ava thinks is amazing.
So it you're ever in a jam and have a lot of glue give it a try.

Monday, January 16, 2012

Hair Bow Holder

I'm really hoping that I can get through this post without falling asleep or my arms falling off.
I recently decided that I really need to get my butt back and shape and today was day one.
I forgot how good it feels to work up a good burn.
I didn't forget how horrible it feels when you can't more the next day or in my case an hour after your done!
I think we'll be doing Subway for dinner tonight.
Well if my arms will hold Mason long enough for me to order! Ha!
Any words of encouragement would be greatly appreciated.
Especially since day 2 is always the worst.

Anyway on to the real post.
I've been wanting to make Ava a hair bow holder for forever but what I really want to do requires taking on some things I've never done before.
So this weekend I finally broke down and made one that's a little more simple then what I want to do.
Maybe this summer I'll try the other one.

This is really simple and I'm sure you've seen them around but it really is perfect for all those cutie patootie hair bows.

First you need a picture frame.
Take out the glass and do whatever with it.
I really need to come up with something to do with all the glass from picture frames I don't use.
You can buy it the color you want or if you're using a old one break out the spray paint.
After you have it the color you want screw in some cup hooks along the bottom of the frame.
Sorry I didn't take pictures of this part.
Ava doesn't wear a lot of headbands because she's like me and can't keep them in so we only put 4 hooks along the bottom.
Just make sure you measure so they are the same distance apart.
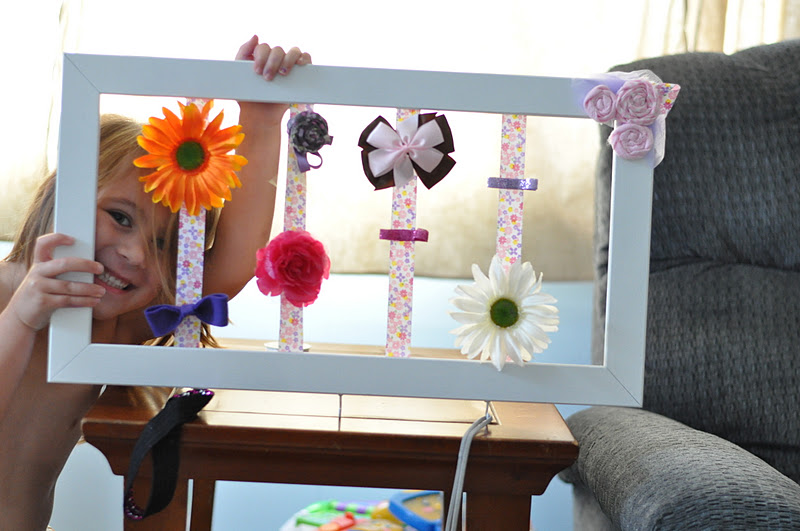
After that's done this is what it should look like.

Now flip it over and decide how many strips of ribbon you want to do.
Measure it out and mark it.
Take a staple gun and staple down the ribbon.

Once you get them all stapled down on both sides you can be done.

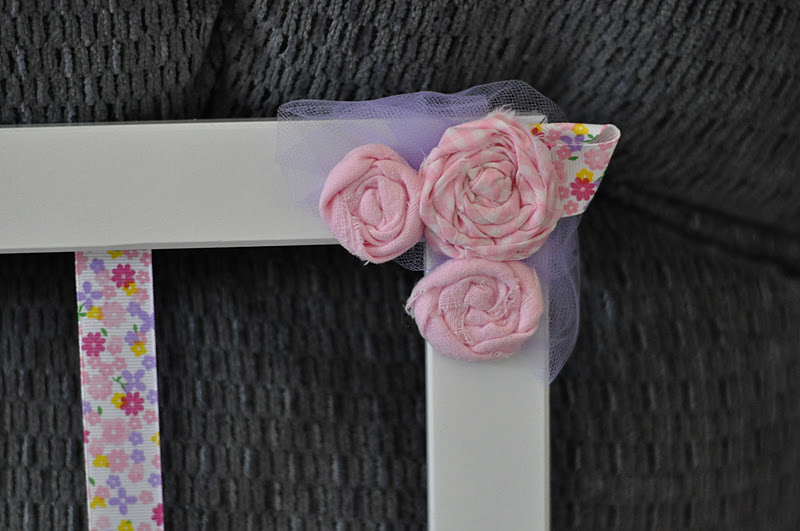
Or you can add a little something.
Ava helped me decide what to decorate it with and this is what we came up with.

Just a little something.
You don't really need to do a lot because the hair bows do quite a bit of decorating.

So stinkin cute and super useful.
Now to find the rest of her bows...humm
Don't mind the crazy nakey that jumped in the picture.


Friday, July 22, 2011

Our New Learning Center

This is something I've been working on for awhile
and it's still not finished but I will probably keep adding/changing it for awhile
So I thought I should just post it.

I am not the kind of person to homeschool my children.
Anyone who does is amazing and I applaud you and your awesomeness.
So my children will go to public school.
But I do feel that there is a pretty big gap between what is taught at school and what the kids need to know.
So my solution is to send them to school and make up that gap at home.
And I'm hoping this little area will help make that easier and more fun.

So here's the big reveal.
The buckets have the chalk and eraser in them and they are up high enough that Mason can't reach them :)
I still need to put up trim around the chalkboard and bulletin board
and I need more buckets for the pegboard
but I'm pretty happy with it and the kids spend tons of time playing with everything.

In the next post I'll show you how I organize all the craft stuff we have.

Saturday, April 23, 2011

Wowza...

The last few days have been craziness.
I've been trying to recoup from Reed and I being sick
and now the kids are 
sick and
cranky and
whiny and
the list goes on.
But I'm sure you know all too well how it is.

On a good note
Reed and I celebrated our 6th anniversary yesterday.
I'm so glad my naive, crazy 18 year old self was smart enough to know we were meant to be together.
It has been a wonderful 6 years full of 
happiness and forgiveness
hard work and lots of play
excitement and trial
but mostly 
FULL OF LOVE
I'm so lucky he's my man.

Now for a quick little project.
I asked my mother in law to get me this vinyl for Christmas.
And of course she came through.
(Sorry I didn't take the time to rotate it)
So I found some scrap wood in the barn and cut it down to size.
Then I painted it a beige I had left from Braeden's room.
I let that dry then watered down some blue paint I had.
I brushed that on in a few spots then wiped it off with a rag.
Sorry I forgot to take pictures of all this.
After that dried I sanded it to death with 220 grit sandpaper.
This is what it looked like after all that.

Can you kinda see???
Then I put on the vinyl.
Can I just say I LOVE it!
The only thing I would do differently would be to water down the beige paint so more of the natural wood was showing through.  Or you could sand it before you add the blue paint.
It feels so good when you finally finish a project.